This website uses Cookies. Click Accept to agree to our website's cookie use as described in our Privacy Policy. Click Preferences to customize your cookie settings.
Turn on suggestions
Auto-suggest helps you quickly narrow down your search results by suggesting possible matches as you type.
Showing results for
- Looker
- Looker Forums
- Exploring & Curating Data
- Large custom map_layers with tiles
Topic Options
- Subscribe to RSS Feed
- Mark Topic as New
- Mark Topic as Read
- Float this Topic for Current User
- Bookmark
- Subscribe
- Mute
- Printer Friendly Page
Solved


 LinkedIn
 Twitter
Post Options
- Mark as New
- Bookmark
- Subscribe
- Mute
- Subscribe to RSS Feed
- Permalink
- Report Inappropriate Content
Reply posted on
--/--/---- --:-- AM
Post Options
- Mark as New
- Bookmark
- Subscribe
- Mute
- Subscribe to RSS Feed
- Permalink
- Report Inappropriate Content
Something that comes up occasionally is a request to add a custom map_layer to Looker that is very large. Most commonly the questions start when a user realizes that the TopoJSON file for their custom map is hundreds of MB or even GBs and that loading the whole thing into the browser at once isn’t going to work.
Luckily, there are great tools available that are low-cost or even free that make this process reasonably simple. It does require a little bit of patience and some developer tools (like the command line), but if you’ve used Github before, it’s probably well within your skillset.
For the purposes of these instructions, I’m going to assume that you already have a single file that represents your map layer. When you’re uploading the file directly to Looker, that file has to be TopoJSON. But for our purposes, we actually need it to be GeoJSON, KML, or a shapefile. If you have TopoJSON, Mapshaper is a super easy tool for transforming it to GeoJSON.
For this tutorial, I’ll use a GeoJSON file that outlines all 73,057 tracts from the 2010 U.S. Census. This GeoJSON weighs in at just over 1 Gb–definitely not something I want users to load into the browser every time they access it.
But I can take advantage of the same technology that drives Google Maps–tiles–to make the file tractable (pun intended). The basic idea is that if I’m zoomed way in, only a few tracts will be in my viewport, so I only need to load those. Then as I pan, I load the adjacent ones and so on.
If, on the other hand, I’m zoomed way out and can see big regions of the country with thousands of tracts, I don’t actually need all the detail that is in my GeoJSON file. Very rough outlines of the tracts (which weigh far less) will suffice.
Tiling the map at various zoom levels gives me all the raw materials I need to only download the pieces of the map I need right now, at the appropriate level of detail. And Mapbox provides a simple set of tools to do it.
-
So first, go create a free account at Mapbox. Once you’ve done that, create an Access Token and save it for later. (The default public scopes work fine.)
-
Then go into Mapbox’s Studio to upload your data. You want to create a new tileset.
-
Once the tileset is uploaded, it’ll take a bit to process (gotta make all those tiles). After it’s done, click in and you’ll see something like this:
-
Now comes the trickiest (but not really that tricky) part. We need to calculate the bounding box for each tile region in our shapefile. This is because in order to know which regions to load at any given time, we need to know what the furthest SW and NE points are that encompass the region.
-
We have a little script that’ll do this for you, which you can download here. The instructions are in the script, but you’re going to do the following:

- Install Yarn by opening a command line and typing (
brew install yarn) - Run Yarn by typing
yarn - Generate the
extents.jsonfile by typingyarn run extents /my/input/geojson.json extents.json ZCTA5. Except you’re going to replace/my/input/geojson.jsonwith the actual location of your file andZCTA5with the ID field in your shapefile that uniquely identifies each region.
-
Now that you have the
extents.jsonfile generated, the last thing you need is to put that somewhere where Looker can access it. You can upload it to an object store like S3 or Google Cloud Storage, but you’ll have to configure the access-control-allow-origin headers properly. You also can’t use Github directly, because it’ll set the wrong “Content-Type Headers.” Luckily, you can upload the file to Github or as a Github gist, and then use this nifty service to fix the headers. -
Now we have all the pieces we need to properly define our new map layer in Looker! Go to your model in Looker and as part of the model file, define your new
map_layeras follows.
map_layer: tract {

  format: "vector_tile_region"

  url: "https://a.tiles.mapbox.com/v4/[YOUR_MAPBOX_TILESET_ID]/{z}/{x}/{y}.mvt?access_token=[YOUR_MAPBOX_ACCESS_TOKEN]"

  feature_key: "[YOUR_MAPBOX_TILESET_NAME]"

  extents_json_url: "https://rawcdn.githack.com/[YOUR_EXTENTS.JSON_FILE_LOCATION]"

  min_zoom_level: [FROM_MAPBOX]

  max_zoom_level: [FROM_MAPBOX]

  property_key: "[THE_UNIQUE_IDENTIFIER_FOR_REGIONS_IN_YOUR_SHAPEFILE]"

}
To illustrate where you’re going to get all this info, see below:

And: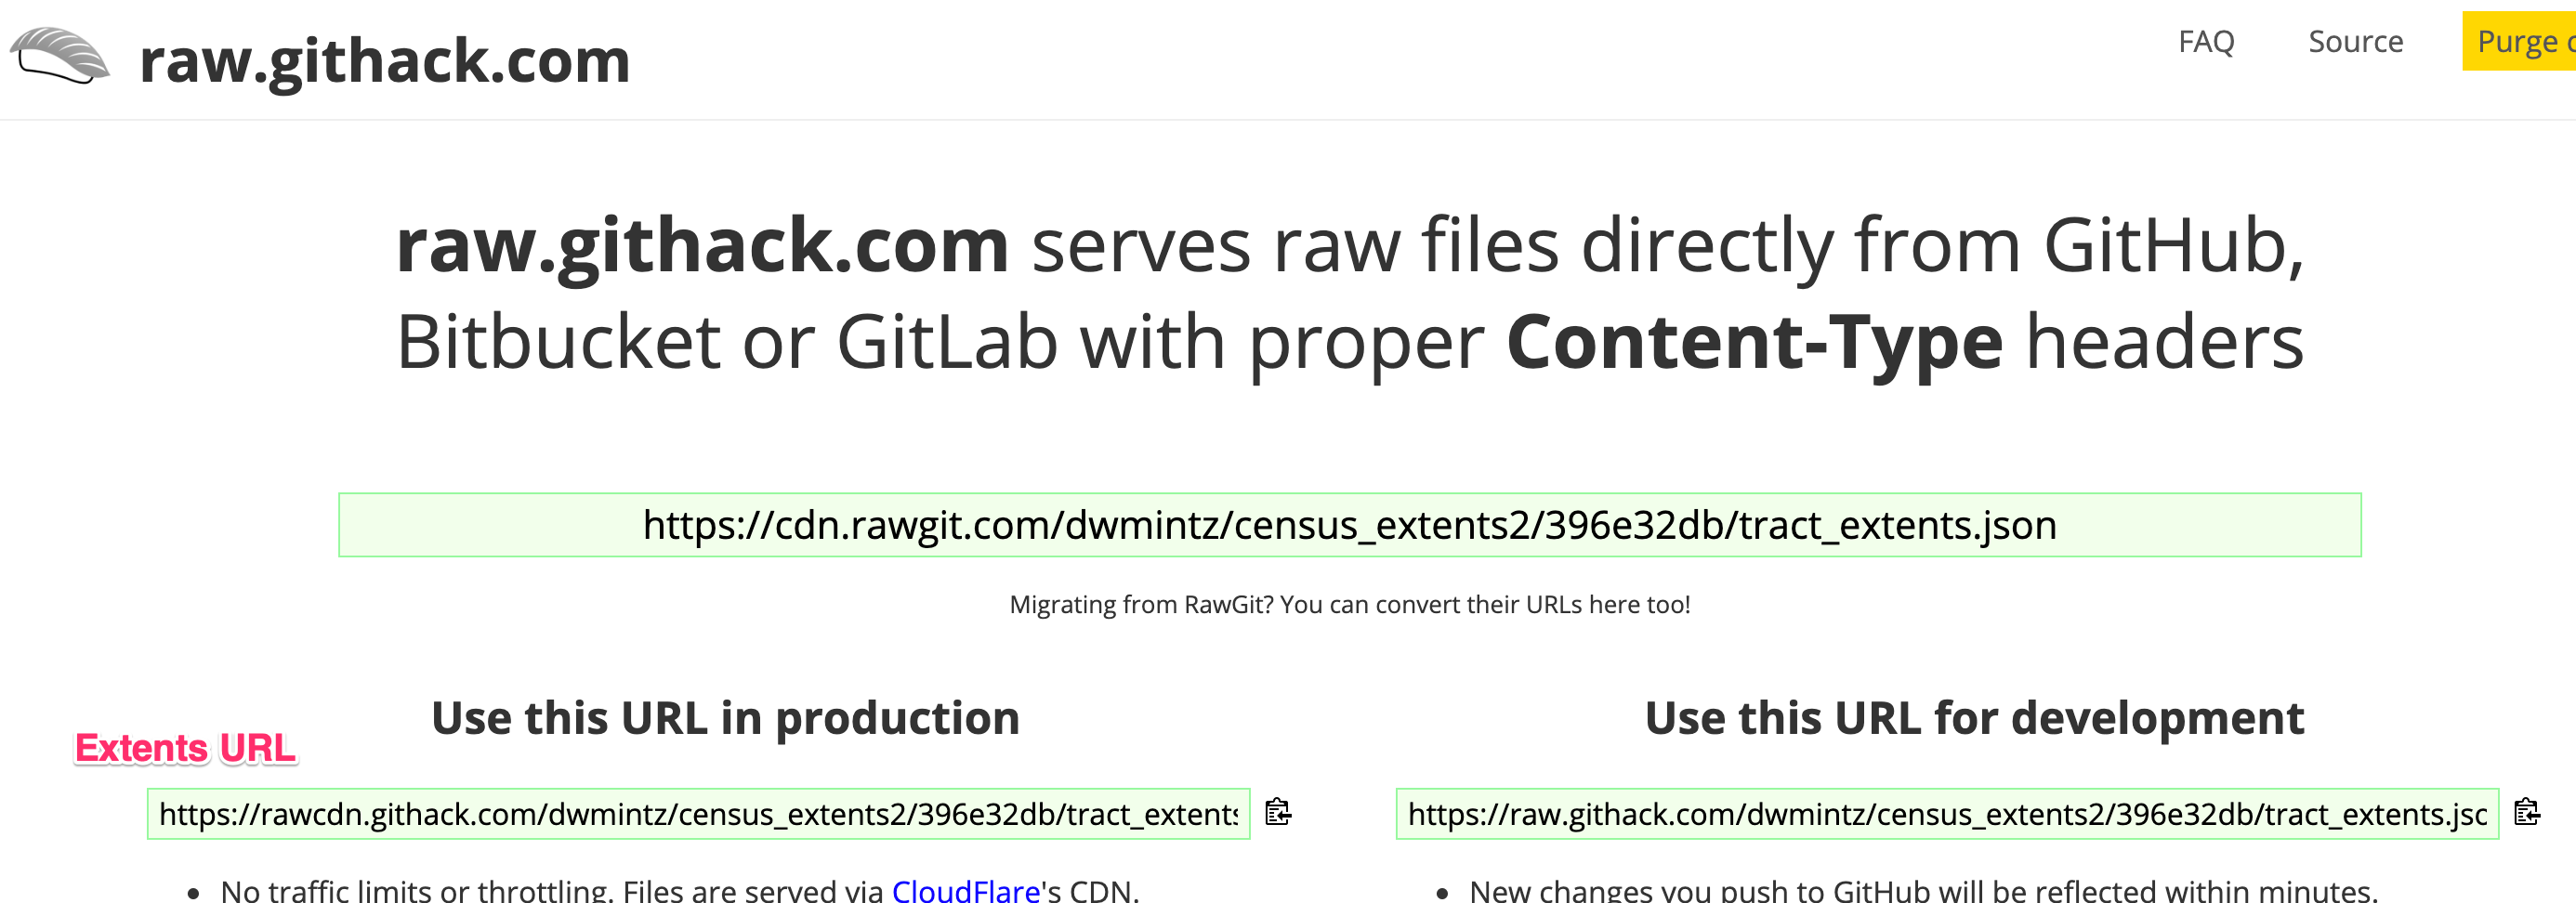
And that’s it! So, not a 5-second process. But it’s totally worth it 

9
30
4,059
Topic Labels
- Labels:
-
lookml
-
visualizations
30 REPLIES 30
Top Labels in this Space
-
access grant
4 -
actionhub
9 -
Actions
14 -
Admin
4 -
alert
29 -
Analytics
2 -
Analytics Block
35 -
Analytics General
1 -
API
12 -
bar
10 -
bestpractice
4 -
BigQuery
8 -
blocks
1 -
boards
4 -
Bug
168 -
cache
2 -
case
2 -
chart
17 -
cohort
1 -
connection
5 -
connection database
1 -
content access
1 -
content-validator
2 -
count
6 -
custom dimension
9 -
custom field
19 -
custom measure
8 -
customdimension
9 -
Dashboards
758 -
Data
5 -
Data Sources
4 -
data tab
4 -
Database
5 -
datagroup
2 -
date-formatting
14 -
dates
18 -
derivedtable
1 -
develop
1 -
development
3 -
dimension
17 -
done
8 -
download
19 -
downloading
9 -
drill-down
1 -
drilling
30 -
dynamic
1 -
embed
10 -
Errors
13 -
etl
1 -
explore
84 -
Explores
136 -
extends
1 -
feature-requests
10 -
filed
3 -
filter
245 -
Filtering
122 -
folders
4 -
formatting
19 -
git
2 -
Google Data Studio
2 -
Google Sheets
2 -
googlesheets
7 -
graph
9 -
group by
6 -
html
12 -
i__looker
1 -
imported project
2 -
Integrations
4 -
javascript
2 -
join
2 -
json
3 -
label
4 -
line chart
17 -
link
5 -
links
3 -
liquid
22 -
Looker
6 -
Looker Studio Pro
49 -
LookerStudio
7 -
lookml
169 -
lookml dashboard
15 -
looks
189 -
manage projects
1 -
map
30 -
map_layer
5 -
Marketplace
4 -
measure
4 -
Memorystore for Memcached
1 -
merge
14 -
model
3 -
modeling
2 -
multiple select
1 -
ndt
1 -
parameter
11 -
pdf
8 -
pdt
8 -
performance
7 -
periodoverperiod
5 -
permission management
1 -
persistence
1 -
pivot
21 -
postgresql
1 -
python
2 -
pythonsdk
2 -
Query
3 -
quickstart
4 -
ReactJS
1 -
redshift
4 -
release
16 -
rendering
8 -
Reporting
10 -
schedule
51 -
schedule delivery
5 -
sdk
1 -
Security
4 -
sharing
2 -
singlevalue
16 -
snowflake
3 -
sql
24 -
SSO
1 -
stacked chart
10 -
system activity
5 -
table chart
16 -
tablecalcs
144 -
Tile
12 -
time
8 -
time zone
3 -
totals
13 -
Training
1 -
Ui
19 -
usage
4 -
user access management
3 -
user management
3 -
user-attributes
6 -
value_format
4 -
view
4 -
Views
4 -
visualizations
558 -
watch
1 -
webhook
2
- « Previous
- Next »